Changes for page KITI StockM SISTEMOS NUSTATYMAI IR FUNKCIJOS
Summary
-
Page properties (2 modified, 0 added, 0 removed)
Details
- Page properties
-
- Title
-
... ... @@ -1,1 +1,1 @@ 1 -OTHER S TOCK-M SYSTEM SETTINGS AND FUNCTIONS1 +OTHER StockM SYSTEM SETTINGS AND FUNCTIONS - Content
-
... ... @@ -2,7 +2,7 @@ 2 2 3 3 == (% style="font-family:inherit; letter-spacing:0.1px" %)**Units of measure**(%%) == 4 4 5 -This parameter is most often renewed from the client's accounting program. If the units of measure are not renewed, then you have to describe and assign them to StockM: StockM→"Other" → "Dimension".5 +This parameter is most often renewed from the client's accounting program. If the units of measure are not renewed, then you have to describe and assign them to StockM: Lists → Dimension. 6 6 7 7 ~1. In the window that opens click the button „New“: 8 8 ... ... @@ -14,9 +14,9 @@ 14 14 15 15 2. Assign the unit of measure to the item - see: [[Item (SKU) settings>>doc:User_Manual.SKU_Settings.WebHome]] 16 16 17 -3. If you want to correct unit of measure: StockM->„Other“ -> „Dimension“– correct the dimension straight in the list.17 +3. If you want to correct unit of measure: Lists -> Dimension – correct the dimension straight in the list. 18 18 19 -4. If you want to remove the dimension (unit of measure): StockM->„Other“ -> „Dimension“– mark the row of dimension and click the button [[image:DeleteSelected.png]]. You can delete only these dimensions, which are not assigned to any item.19 +4. If you want to remove the dimension (unit of measure): Lists -> Dimension – mark the row of dimension and click the button [[image:DeleteSelected.png]]. You can delete only these dimensions, which are not assigned to any item. 20 20 21 21 == **Suppliers units of measure (conversion of units of measure) ** == 22 22 ... ... @@ -40,12 +40,12 @@ 40 40 41 41 2. In the "Conversion type (multiplier/divider)" column, specify whether the conversion type is a multiplier or divider. 42 42 43 -3. Enter the coefficient in the column „Dimension conversion ratio“ – it is the number, by which after multiplying or dividing S TOCK-M units, we will get supplier's unit. (SKU dimension in suppliers system is calculated according the formulas:43 +3. Enter the coefficient in the column „Dimension conversion ratio“ – it is the number, by which after multiplying or dividing StockM units, we will get supplier's unit. (SKU dimension in suppliers system is calculated according the formulas: 44 44 45 -* Supplier's unit = S TOCK-M unit of measure * Supplier's unit multiplier OR45 +* Supplier's unit = StockM unit of measure * Supplier's unit multiplier OR 46 46 * Supplier's unit = StockM unit of measure / Supplier's unit divider. 47 47 48 -4.** **If there is set conversion of unit of measure for the item, in S TOCK-M new order you can see ordered quantity in STOCK-M unit of measure (column "Quantity") and the supplier unit of measure (column "Quantity" (Supplier Units) ). In the order, sent to the supplier, will be specified quantity by supplier units of measure.48 +4.** **If there is set conversion of unit of measure for the item, in StockM new order you can see ordered quantity in StockM unit of measure (column "Quantity") and the supplier unit of measure (column "Quantity" (Supplier Units) ). In the order, sent to the supplier, will be specified quantity by supplier units of measure. 49 49 50 50 5. If the same item can be supplied from several alternative suppliers and is ordered in different units of measure, so for each supplier must be assigned a conversion of unit of measure. 51 51 ... ... @@ -77,7 +77,7 @@ 77 77 If you want to select the currency, firstly need to describe it. 78 78 79 79 80 -~1. In menu point „Other“select„Currency“. Create the desired currency in this menu point, by which you see order amount in money, which is formed for supplier (currency is assigned for each supplier in supplir card, see: [[Supplier settings>>doc:User_Manual.Suppliers.WebHome]]).80 +~1. In menu point Lists select Currency. Create the desired currency in this menu point, by which you see order amount in money, which is formed for supplier (currency is assigned for each supplier in supplier card, see: [[Supplier settings>>doc:User_Manual.Suppliers.WebHome]]). 81 81 82 82 [[image:57_Currency.png]] 83 83 ... ... @@ -97,7 +97,7 @@ 97 97 98 98 When editing a new order or changing the buffer, the system asks you to choose the reason for the edit. You need to create a reason before you can choose it. 99 99 100 -~1. In menu point „Other“select„Reasons“.100 +~1. In menu point Lists select Reasons. 101 101 102 102 [[image:58_Reasons.png]] 103 103 ... ... @@ -127,7 +127,7 @@ 127 127 128 128 == **Report "Buffer dynamics"** == 129 129 130 -~1. A report, showing how many and in what status there are item names in every storage place: STOCK-M → "Reports"→"Buffer Dynamics"(data is collected and recorded daily).130 +~1. A report, showing how many and in what status there are item names in every storage place: Reports → Buffer Dynamics (data is collected and recorded daily). 131 131 132 132 2. This report shows daily situation of DTA goods (goods that must be in storage place), also it is possible to see the status of DTO and NM goods. 133 133 ... ... @@ -155,7 +155,7 @@ 155 155 156 156 == **Report „Inventory dynamics“** == 157 157 158 -~1. Report, which shows the situation (in purchase prices, EUR) within the company/separate company storage places/individual suppliers inventory dynamics: STOCK-M → "Reports"→"Inventory dynamics".158 +~1. Report, which shows the situation (in purchase prices, EUR) within the company/separate company storage places/individual suppliers inventory dynamics: Reports → Inventory dynamics. 159 159 160 160 2. In the opened Inventory dynamics reports window you can see information (data is collected and fixed every calendar week). 161 161 ... ... @@ -167,7 +167,7 @@ 167 167 168 168 4) [[image:Overstock.png]] – overstock inventory for the last day of the week; 169 169 170 - 5) [[image:Turnover.png]]– how fast items "turns around" at the storage place during the year; 170 + 5) [[image:Turnover.png]]– how fast items "turns around" at the storage place during the year; It is possible to see it in days as well. Contact the StockM team if it is necessary. 171 171 172 172 6) [[image:ROI AD.PNG]] - annual returns of inventory to investments, i.e. how much you earned from inventory (for example: ROI = 0% it means you didn't earn anything extra, you only got back, what you invested; ROI = 100% means you got what you invested and earned double). 173 173 ... ... @@ -231,7 +231,7 @@ 231 231 232 232 == (% style="letter-spacing:0.1px" %)**Report "Inventory level (DTA)"**(%%) == 233 233 234 -~1. The report is designed to evaluate the level of DTA goods inventory: STOCK-M → "Reports"→"Inventory Level (DTA)"(data is collected and recorded daily).234 +~1. The report is designed to evaluate the level of DTA goods inventory: Reports → Inventory Level (DTA) (data is collected and recorded daily). 235 235 2. DTA items are showed in the report with balance > 0 relation with all DTA items (SKU through all warehouses), expressed in %. 236 236 3. Information is depicted by two curves: 237 237 ... ... @@ -266,12 +266,139 @@ 266 266 267 267 == (% style="letter-spacing:0.1px" %)**Report "Interval analysis"**(%%) == 268 268 269 +This report is paid. Report in StockM: REPORTS → EXTRA → INTERVAL ANALYSIS REPORT. 269 269 271 +Report is needed for: 272 + 273 +• Compare sales at different times (season and none season) at SKU level over warehouses 274 + 275 +and calculate the seasonal coefficient. 276 + 277 +• To calculate order once to the current moment according to the obtained 278 + 279 +season coefficient for the current moment, evaluating the SKU settings 280 + 281 +during the report formation; 282 + 283 +• Upload once order if needed; 284 + 285 +• Use the calculated season coefficient to create the season (as needed). 286 + 287 + 288 +Go to : REPORTS → EXTRA → INTERVAL ANALYSIS 289 + 290 +[[image:image-20220307161528-1.png]] 291 + 292 + 293 +The report must specify the parameters: 294 + 295 +• start date of the analyzed season; 296 + 297 +• end date of the analyzed season; 298 + 299 +• the start date of the comparable season (none season); 300 + 301 +• the end date of the comparable season (none season) (if not specified, is automatically 302 + 303 +selected according to the length of the analyzed period and assigns an end 304 + 305 +date); 306 + 307 +• warehouse (s); 308 + 309 +• supplier (s); 310 + 311 + 312 +For the formation a list of items, additionally may be specified: 313 + 314 +• product group (s); 315 + 316 +• state; 317 + 318 +• ASS; 319 + 320 +• SKU name fragment (items with this fragment will be included). 321 + 322 + 323 + 324 +You'll see the following fields in the generated report: 325 + 326 +[[image:image-20220307161528-2.png]] 327 + 328 + 329 +• SKU; 330 + 331 +• Item name; 332 + 333 +• Group; 334 + 335 +• Supplier name; 336 + 337 +• Warehouse name;• Warehouse code; 338 + 339 +• Unit.; 340 + 341 +* Avg. daily sales during none season; 342 +* All daily sales during none season (sum; unit); 343 + 344 +• Avg. daily sales during season; 345 + 346 +* All daily sales during season (sum; unit); 347 + 348 +• Season coefficient. = Avg. daily sales during none season / Avg. daily sales 349 + 350 +during season; 351 + 352 +• Promo during season (field is empty - promo did not happened; promo 353 + 354 +happened – the name of the promo); 355 + 356 +• Current buffer; 357 + 358 +• Current balance; 359 + 360 +• Current on the way; 361 + 362 +• Current promo (field is empty - promo is not running; there is a name - the 363 + 364 +name of the ongoing promo); 365 + 366 +• MOQ; 367 + 368 +• USQ (package); 369 + 370 +• Current amount to (at the time of the report generation) 371 + 372 +• Calculated order once = Current buffer * (Season coefficient - 1). The 373 + 374 +quantity can be edited manually; 375 + 376 +• Use calculated order once (write 1 if the value " Calculated order once needs 377 + 378 +to be loaded as a one-time replenishment; the field is left blank - if no 379 + 380 +replenishment is required). By default in StockM, the field is left blank. 381 + 382 +• IOH after once order = Current balance + Current on the way + Calculated 383 + 384 +StockM replenishment + Order; 385 + 386 +• ABC (at the time of the report generation; 387 + 388 +* Manufacturer. 389 + 390 +In the report “Interval Analysis” is possibility to calculate group total sales during the season and none season. If you want to see this information, you need to check “Add group totals”. 391 + 392 + 393 +In the report for the new (which was not during the season sales) SKU, will be applied the group season coefficient. 394 + 395 + 396 + 270 270 (% style="font-weight:normal" %) 271 271 272 272 == **System warnings** == 273 273 274 -~1. The S TOCK-M system records errors, that can lead to incorrectly managed inventory. These errors appears in the System Warning window and we recommend to review and correct them:STOCK-M→"Warnings".401 +~1. The StockM system records errors, that can lead to incorrectly managed inventory. These errors appears in the System Warning window and we recommend to review and correct them: Taskbar → Warnings. 275 275 276 276 2. Systematic warnings window is splitted in two parts „Critical warnings“ and „Other warnings“. 277 277 ... ... @@ -353,7 +353,7 @@ 353 353 354 354 1.__// Item data are not updated more than 7 days//__ 355 355 356 -Items, which data are not updated, distort reports due to their false old data, because the last balance, received during data exchange, is saved and visible in the S TOCK-M system.483 +Items, which data are not updated, distort reports due to their false old data, because the last balance, received during data exchange, is saved and visible in the StockM system. 357 357 358 358 ((( 359 359 ... ... @@ -377,13 +377,13 @@ 377 377 378 378 ))) 379 379 380 -* If the items do not actually have to be updated/renewded to S TOCK-M, then change the state of the items to NA, in the STOCK-M (see: [[Item (SKU) Settings>>doc:User_Manual.SKU_Settings.WebHome]]);507 +* If the items do not actually have to be updated/renewded to StockM, then change the state of the items to NA, in the StockM (see: [[Item (SKU) Settings>>doc:User_Manual.SKU_Settings.WebHome]]); 381 381 382 382 ((( 383 383 384 384 ))) 385 385 386 -* If the items need to be updated to S TOCK-M, then adjust the appropriate procedures in the accounting.513 +* If the items need to be updated to StockM, then adjust the appropriate procedures in the accounting. 387 387 388 388 ((( 389 389 ... ... @@ -433,19 +433,29 @@ 433 433 434 434 7. //__Purchase price <=0; sale price <=0__// 435 435 436 -Incorrect prices distort reports. You need to check and adjust prices in accounting that updates data to S TOCK-M.563 +Incorrect prices distort reports. You need to check and adjust prices in accounting that updates data to StockM. 437 437 438 -8. //Very rare setting: RD>GD// (In exceptional cases, may be RD>GD, used only then, when it is seeking to decrease the inventory fast. The setting is made only after agreement with the S TOCK-M team).565 +8. //Very rare setting: RD>GD// (In exceptional cases, may be RD>GD, used only then, when it is seeking to decrease the inventory fast. The setting is made only after agreement with the StockM team). 439 439 440 440 Normally, the RD must be equal or lower than the GD. 441 441 442 -((( 443 - 444 -))) 445 - 446 446 * Click the button „Show“ – in the table that opens you will get the list of suppliers, which RD>GD; 447 447 * Correct supplier RD and GD (see: [[Supplier settings>>doc:User_Manual.Suppliers.WebHome]]). 448 448 572 +9. __//Buf < MinBuf//__ 573 + 574 +DTA item's buffer cannot be less than min. buffer. Auto-correction will increase the buffer to min. buffer. 575 + 576 +* Click the "Show" button - the table that opens lists you will see the items whose buffer is less than the minimum buffer. 577 +* if you press the "Edit" button - the system will increase the buffer to min. Buffer. 578 + 579 + 580 +10.**// //**__//Buffer < Lowest system buffer//__ 581 + 582 +The warning Buffer <Lowest system buffer (LowSysBuff). It shows SKUs whose buffers are less as lowest system buffer. 583 + 584 +Lowest system buffer – value, which is specified when desired that the buffer would not be less than coefficient (1-1.5) x MOQ (minimal order quantity). LowSysBuff is set for all goods at company level total or separate at warehouse level. 585 + 449 449 ((( 450 450 451 451 ))) ... ... @@ -508,7 +508,7 @@ 508 508 509 509 == **Sorting** == 510 510 511 -~1. In the S TOCK-M window that opens, you can sort the values of the selected column (numeric - from the smallest to the biggest and opposite; text - according to alphabet from A to Z and648 +~1. In the StockM window that opens, you can sort the values of the selected column (numeric - from the smallest to the biggest and opposite; text - according to alphabet from A to Z and 512 512 513 513 2. On the desired column name, which you want to sort, click with the left mouse button 1 time, the system will sort the column. Near the column name appears [[image:rusiavimas aukstyn.PNG]], it means that it is sorted in ascending order (from the lowest to highest; from A to Z). 514 514 ... ... @@ -516,31 +516,31 @@ 516 516 517 517 == **Selection of columns** == 518 518 519 -You can select which columns you need to see, while working with the inventory management system S TOCK-M.656 +You can select which columns you need to see, while working with the inventory management system StockM. 520 520 521 -~1. When you open S TOCK-M window, where you want to work, after filtering the relevant item/storage place and other (or before filtering the list), click „Set visibility for columns“ in table settings.658 +~1. When you open StockM window, where you want to work, after filtering the relevant item/storage place and other (or before filtering the list), click „Set visibility for columns“ in table settings. 522 522 523 523 [[image:66_TableSettings.png]] 524 524 525 -2. In the table that opens mark these columns, which you want to see in S TOCK-M window and click the button „Confirm the setup“.662 +2. In the table that opens mark these columns, which you want to see in StockM window and click the button „Confirm the setup“. 526 526 527 527 3. If you will sign in from the same device, the same window will be opened, which was opened before signing out with columns visibility and arrangement. 528 528 529 -* this applies to every window in the S TOCK-M system.666 +* this applies to every window in the StockM system. 530 530 531 -4. If you want to see columns again, select "All columns" in the opened S TOCK-M window via Table settings window, in the columns settings list.668 +4. If you want to see columns again, select "All columns" in the opened StockM window via Table settings window, in the columns settings list. 532 532 533 533 OR select „Select all“ in the columns visibility form 534 534 535 535 [[image:67_ColumnVisibilityForm.png]] 536 536 537 -5. In the S TOCK-M system window that opens, you can select the size of column, i.e. decrease or increase. Place the mouse on the right side of the column name, while appears [[image:dvipuse rodykle.PNG]] (double-sided arrow). Click the right button of the mouse and move the mouse to the left or right side (depending on whether you want to increase or decrease the size of the column).674 +5. In the StockM system window that opens, you can select the size of column, i.e. decrease or increase. Place the mouse on the right side of the column name, while appears [[image:dvipuse rodykle.PNG]] (double-sided arrow). Click the right button of the mouse and move the mouse to the left or right side (depending on whether you want to increase or decrease the size of the column). 538 538 539 539 OR select „Autosize All Columns“ after clicking the right button of the mouse in any place of the table. 540 540 541 541 [[image:68_table.png]] 542 542 543 -6. In the S TOCK-M system window that opens, you can also change the place of each column, in the order you prefer. Place the mouse on the column name, which you want to move. Click the left button of the mouse and "drag" the column to the desired place.680 +6. In the StockM system window that opens, you can also change the place of each column, in the order you prefer. Place the mouse on the column name, which you want to move. Click the left button of the mouse and "drag" the column to the desired place. 544 544 545 545 7. You can "freeze" the desired column. Cick the right button of the mouse on the desired column name and drag it to the left side, while the icon [[image:smeigtukas.PNG]] will appear. You will always see such column at the top of the list. 546 546 ... ... @@ -566,7 +566,7 @@ 566 566 567 567 == **Table export to Excel (*.xlsx), to CSV (*.csv)** == 568 568 569 -When you work with inventory management system S TOCK-M, you have a possibility to export the selected list to Excel or csv. In opened STOCK-M window at the top of any table find the icon [[image:eksportavimo ikonele.PNG]]. Click the icon, select to what form you want to export the table, download the desired file and save the table to the desired place.706 +When you work with inventory management system StockM, you have a possibility to export the selected list to Excel or csv. In opened StockM window at the top of any table find the icon [[image:eksportavimo ikonele.PNG]]. Click the icon, select to what form you want to export the table, download the desired file and save the table to the desired place. 570 570 571 571 There are additional forms for export in some windows in the export list (for example, in the supply graphs window you can download full information form about suppliers). 572 572 ... ... @@ -574,23 +574,22 @@ 574 574 575 575 576 576 577 -~1. In the STOCK-M window that opens, you can copy the value of one of the selected fields, e.g. item code, name, etc. mark the selected field with the left button of the mouse and press "Ctrl + C" on the keyboard - the value of the field is copied. Then press "Ctrl + V" at the selected place (S TOCK-M filter, excel, word).714 +~1. In the STOCK-M window that opens, you can copy the value of one of the selected fields, e.g. item code, name, etc. mark the selected field with the left button of the mouse and press "Ctrl + C" on the keyboard - the value of the field is copied. Then press "Ctrl + V" at the selected place (StockM filter, excel, word). 578 578 579 579 2. If you want to copy more than one field, then mark the desired place with the left button of the mouse, after clicking the right button of the mouse select "Copy" or "Copy With Headers" from the list and paste the copied values into the desired file (excel, word, etc.). 580 580 581 581 582 582 583 -== **Item bufferschedule** ==720 +== **Item schedule** == 584 584 722 +You can see the schedule of each item movement in StockM system. 585 585 724 +~1. The schedule of the item you can open in StockM window, when you click the icon [[image:sku grafikas ikonele.PNG]] near the selected item or in the line by right-clicking and selecting “SKU graph”. 586 586 587 -You can see the schedule of each item movement in STOCK-M system. 588 - 589 - 590 -~1. The schedule of the item you can open in STOCK-M window, when you click the icon [[image:sku grafikas ikonele.PNG]] near the selected item or in the line by right-clicking and selecting “SKU graph”. 591 - 592 592 2. In the item graph window that opens, you see the 3-month dynamics of the item buffer and safety buffer (red zone - if the balance of item is in this zone, the inventory level is risky low; yellow zone - the level of item inventory is optimal; green zone - the level of item inventory is safe, above green areas - overstock). If you place the mouse on the green area, you will see the date of the buffer, the value of the buffer, and the reason for changing the buffer (if the buffer was changed that day, you'll see a red dot at the top of the buffer). 593 593 728 +The color display of the buffer is not displayed in the SKU schedule during the period when the item status is * TO. The value of the buffer is written "No * TA". 729 + 594 594 3. Also in the graph of an item you see curves: balance ([[image:likutis sku.PNG]]), sales+transfers ([[image:pardavimai ir perdavimai sku.PNG]]), supplied ([[image:papildyta sku.PNG]]), sales ([[image:pardavimai sku.PNG]]) PTO ([[image:rezervacija sku.PNG]]). These curves you can take off and put on again. If you want to do this, you need to click on the desired curve in the a legend. Your made changes will be saved automatically, i.e. in other‘s items graph you will see only these curves, which you marked in previous item graph. If changes are not made, by default in item graph are showed all curves. 595 595 596 596 //If you place the mouse on the selected curve (for example, balance) dot, you will see the date of that balance, value of that balance.// ... ... @@ -623,7 +623,7 @@ 623 623 624 624 == **Order amount, balance amount** == 625 625 626 -In the S TOCK-M inventory windows (STOCK-M-> Inventory-> Buffers to increase, Buffers to decrease and others)click the icon [[image:sumu ikonele.PNG]] , which is at the bottom in the right corner of the table, here you can see information of the selected list of items:762 +In the StockM Taskbar -> Buffers to increase, Buffers to decrease and others, click the icon [[image:sumu ikonele.PNG]] , which is at the bottom in the right corner of the table, here you can see information of the selected list of items: 627 627 628 628 ~1. Ordering amount – for what amount of money inventory shall be ordered according to set buffers of items; 629 629 ... ... @@ -631,7 +631,7 @@ 631 631 632 632 == **Paging** == 633 633 634 -S TOCK-M shows 100 rows by default in a single window (the user can change the number of showed rows by selecting 200 or 500 rows, when user will open the page again, by default will be set 100). If you awork with a list of more than 100 rows, then more than 1 page will appear. Pages are showed in the center at the bottom of the window.770 +StockM shows 100 rows by default in a single window (the user can change the number of showed rows by selecting 200 or 500 rows, when user will open the page again, by default will be set 100). If you awork with a list of more than 100 rows, then more than 1 page will appear. Pages are showed in the center at the bottom of the window. 635 635 636 636 ~1. If you want to go to another window, click [[image:1 i prieki.PNG]] 637 637
- Units of measure
- Suppliers units of measure (conversion of units of measure)
- Currency setting
- Orders (lines) change/cancellation and reasons of buffer change creation
- Search in the Order window
- Report "Buffer dynamics"
- Report „Inventory dynamics“
- Report "Inventory level (DTA)"
- Report "Interval analysis"
- System warnings
- Filter
- Search according context in drop-down lists
- Sorting
- Selection of columns
- Additional functionality of the right mouse button
- Table export to Excel (*.xlsx), to CSV (*.csv)
- Copying item code/name/other fields
- Item buffer schedule
- Item schedule
- Order amount, balance amount
- Paging
Units of measure
This parameter is most often renewed from the client's accounting program. If the units of measure are not renewed, then you have to describe and assign them to StockM: StockM → "Other" → "Dimension".
This parameter is most often renewed from the client's accounting program. If the units of measure are not renewed, then you have to describe and assign them to StockM: Lists → Dimension.
1. In the window that opens click the button „New“:
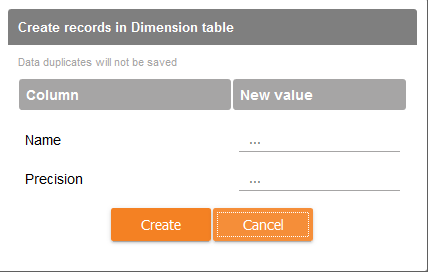
1) Name – enter the name of unit of measurement (short name of dimension, eg.: unit or kg).
2) Precision – entered number shows how many numbers after the comma is showed (0 – whole number/integer). According this setting order quantity, buffer is rounded/not rounded.
2. Assign the unit of measure to the item - see: Item (SKU) settings
3. If you want to correct unit of measure: StockM -> „Other“ -> „Dimension“ – correct the dimension straight in the list.
3. If you want to correct unit of measure: Lists -> Dimension – correct the dimension straight in the list.
4. If you want to remove the dimension (unit of measure): StockM -> „Other“ -> „Dimension“ – mark the row of dimension and click the button  . You can delete only these dimensions, which are not assigned to any item.
4. If you want to remove the dimension (unit of measure): Lists -> Dimension – mark the row of dimension and click the button . You can delete only these dimensions, which are not assigned to any item.
Suppliers units of measure (conversion of units of measure)
When a unit of measure of the supplier differs from the customer's unit of measure, it is possible to save the conversion of units of measure together with the rest parameters of the item in the supplier system. According to it the quantity in the supplier units of measure will be calculated. To do this, you must specify the conversion coefficient and its type: multiplier  or divider
  , that is of how many supplier units consists 1 unit of the customer, or how many customer units are included in 1 unit of measure of the supplier.
Examples:
- Quantity in StockM is controlled by bottles, but it is necessary to place an order to the supplier by liters. One bottle contains 1.5 L, in which case the coefficient = 1.5 should be specified and the conversion type is a multiplier.
If StockM program offers to order 10 pieces, then according to the units of measure of supplier 10pcs. * 1.5 L = 15l.
- Quantity in StockM is controlled by units, but it is necessary to place an order to the supplier by boxes. One box contains 10pcs. in which case coefficient = 10 should be specified and the conversion type is a divider.
If StockM program offers to order 60 pieces, then according to the units of measure of supplier 60pcs. / 10pcs. = 6 boxes
Conversion of unit of measure you can set for an item in the Supplier Information window: Suppliers info → Supplier SKU info.

1. In the opened column „SKU dimension in supplier ERP“ select unit of measurement, if you don‘t find it, so create it (see: Units of measure).
2. In the "Conversion type (multiplier/divider)" column, specify whether the conversion type is a multiplier or divider.
3. Enter the coefficient in the column „Dimension conversion ratio“ – it is the number, by which after multiplying or dividing STOCK-M units, we will get supplier's unit. (SKU dimension in suppliers system is calculated according the formulas:
3. Enter the coefficient in the column „Dimension conversion ratio“ – it is the number, by which after multiplying or dividing StockM units, we will get supplier's unit. (SKU dimension in suppliers system is calculated according the formulas:
- Supplier's unit = STOCK-M unit of measure * Supplier's unit multiplier OR
- Supplier's unit = StockM unit of measure * Supplier's unit multiplier OR
- Supplier's unit = StockM unit of measure / Supplier's unit divider.
4. If there is set conversion of unit of measure for the item, in STOCK-M new order you can see ordered quantity in STOCK-M unit of measure (column "Quantity") and the supplier unit of measure (column "Quantity" (Supplier Units) ). In the order, sent to the supplier, will be specified quantity by supplier units of measure.
4. If there is set conversion of unit of measure for the item, in StockM new order you can see ordered quantity in StockM unit of measure (column "Quantity") and the supplier unit of measure (column "Quantity" (Supplier Units) ). In the order, sent to the supplier, will be specified quantity by supplier units of measure.
5. If the same item can be supplied from several alternative suppliers and is ordered in different units of measure, so for each supplier must be assigned a conversion of unit of measure.
6. You can do edit in one row or edit selected rows.
7. In the supplier information window you can also enter the SKU code in the supplier system and the name in the supplier system. These values you can also enter during data exchange (via skubody.csv faile), if it is agreed at the beginning of the project.
It is possible to transfer information of the Supplier supplied items (SKU) to StockM during data exchange using new file supplier_SKU.csv.
Information transferred to StockM via file is:
- supplier code;
- item code (SKU);
- SKU code in the supplier's ERP;
- SKU name in supplier's ERP;
- SKU unit of measure (dimension) is the supplier's ERP;
- Supplier's minimum ordered quantity - MOQ (by supplier's unit of measure (dimension));
- Quantity of Supplier's minimum unbreakable packaging - USQ (by supplier's unit of measure (dimension));
- Conversion ratio to the supplier's unit of measure (dimension);
- Supplier's purchase price - the price offered by the supplier without VAT per one unit of measurement (dimension) of the supplier, in the base currency. If there is no offer, 0 is displayed;
- Supplier's balance - the free quantity of item in the supplier's warehouse in the supplier's units of measure (dimension).
Currency setting
When orders for the suppliers are sent to different countries, it is useful and necessary to see the orders in currencies, which is used by the supplier. For example, see in what amount (in monetary amount) a new order has formed, or while describing the terms of supplier optimization monetary amount.
If you want to select the currency, firstly need to describe it.
1. In menu point „Other“ select „Currency“. Create the desired currency in this menu point, by which you see order amount in money, which is formed for supplier (currency is assigned for each supplier in supplir card, see: Supplier settings).
1. In menu point Lists select Currency. Create the desired currency in this menu point, by which you see order amount in money, which is formed for supplier (currency is assigned for each supplier in supplier card, see: Supplier settings).
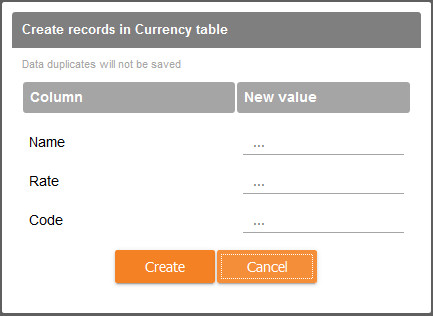
2. In the table that opens enter/write:
1) Name – name of the currency, which you want to enter (eg. Eur, USD);
2) Rate – rate of exchange with the main currency.
3) Code – short name (abbreviation) of the desired currency (eg. Eur, USD). If you want that rate of exchange would be renewed automatically, so abbreviation of currency must match with Lithuania Bank abbreciation of currency.
3. If you want to adjust the settings for a particular currency, you can do this on the list row. Adjustments are allowed for Title and Course.
4. If you want the rate of exchange would update regularly according the LB official rate - additional settings are required in the SM Admin section. Contact your project manager for settings.
Orders (lines) change/cancellation and reasons of buffer change creation
When editing a new order or changing the buffer, the system asks you to choose the reason for the edit. You need to create a reason before you can choose it.
1. In menu point „Other“ select „Reasons“.
1. In menu point Lists select Reasons.
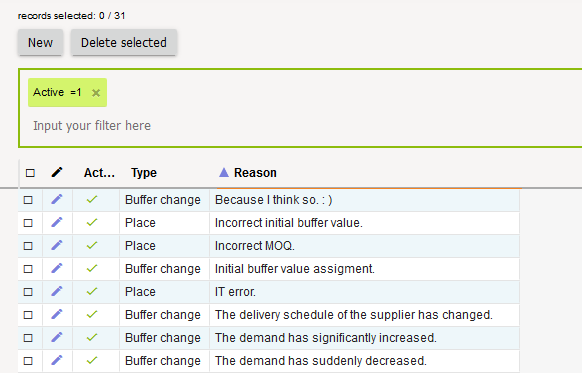
2. In the window that opens you see already created reasons. If you need to create new, click  .
.
3. In the table that opens, select:
1) Activity of reason;
2) Type of reason: editing and deleting a new order (send) or change of buffer;
3) Enter the content of the reason;
4) Click „Create“.
4. If you want to edit already entered reason, this you can do just in the desired row.
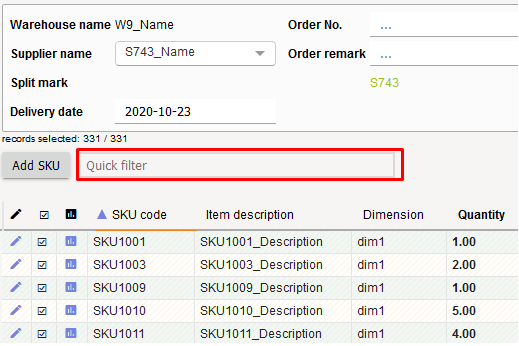
Search in the Order window
In all Order windows (New orders, Placed orders, Sent orders history) a quick filter / search input field "Quick filter" has been created.
- The filter / search works immediately with each character entry.
- The filter / search works from all columns.
- If at least one character is entered in the filter / search field, the edges of the field are marked by a green line (filter active) and at the same time all buttons in the order window are switched off (gray color). In other words, as long as the filter is active, the information is filtered in the window - a visible part of the order is only visible and no actions with order can be saved, sent, etc.
Report "Buffer dynamics"
1. A report, showing how many and in what status there are item names in every storage place: STOCK-M → "Reports" → "Buffer Dynamics" (data is collected and recorded daily).
1. A report, showing how many and in what status there are item names in every storage place: Reports → Buffer Dynamics (data is collected and recorded daily).
2. This report shows daily situation of DTA goods (goods that must be in storage place), also it is possible to see the status of DTO and NM goods.
3. The reservation is evaluated in teh report, and the reserved quantity will be evaluated as sold. (for example: if the balance of the item is 100 pieces and the entire balance is reserved, the system will think that the item is sold and he item will enter the black zone in "Buffer status" report).
4. The report allows you to select by what "incision" you want to see goods situation daily: in whole company (how many names of DTA are missing, how many are at risk, what is optimal quantity, what is the right level of inventory, how many is DTO and NM goods), separately at each storage place, by selected supplier, by manufacturer, by group, by user.
5. When you take the mouse over the graph, you see the date and the number of items, which is on the selected day.
6. Meanings of colors:
 – items are not at the storage place (the balance of item compose <=3% of set item buffer).
 – the balance of item is risky low at the storage place (the balance of item compose 4-33% of set item buffer)..
 – the balance of item is optimal (the balance of item compose 34-66% of set item buffer).
 – the balance of item is safe (the balance of item compose 67-100% of set item buffer).
 – the balance of item is safe (the balance of item compose 67-100% of set item buffer).
 - quantity of items, which has DTO state (the balance is not estimated).
 - quantity of items, which has NM state (the balance is not estimated).
Report „Inventory dynamics“
1. Report, which shows the situation (in purchase prices, EUR) within the company/separate company storage places/individual suppliers inventory dynamics: STOCK-M → "Reports" → "Inventory dynamics".
1. Report, which shows the situation (in purchase prices, EUR) within the company/separate company storage places/individual suppliers inventory dynamics: Reports → Inventory dynamics.
2. In the opened Inventory dynamics reports window you can see information (data is collected and fixed every calendar week).
1)  - total weekly sales;
2)  – total average weekly inventory;
3)  – total lost sales of the company, due to the fact that you did not have the goods in storage place during the week;
4) – overstock inventory for the last day of the week;
5)  – how fast items "turns around" at the storage place during the year;
5) – how fast items "turns around" at the storage place during the year; It is possible to see it in days as well. Contact the StockM team if it is necessary.
6)  - annual returns of inventory to investments, i.e. how much you earned from inventory (for example: ROI = 0% it means you didn't earn anything extra, you only got back, what you invested; ROI = 100% means you got what you invested and earned double).
- When you enter with the mouse over a group of columns in this report, a window with date and values pops up. Next to lost sales and overstock you can see the percentage value in parentheses:
- lost sales from sales;
- overstock from inventory.
- This report can be exported into Excel. After selecting the desired storage place, supplier, group, click
 .
.
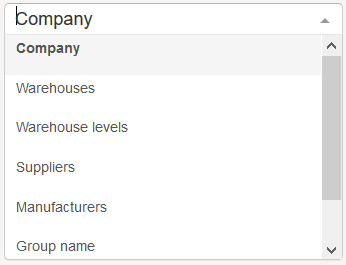
3. At the bottom of the graph select the incision, by which you want to analyze the report:
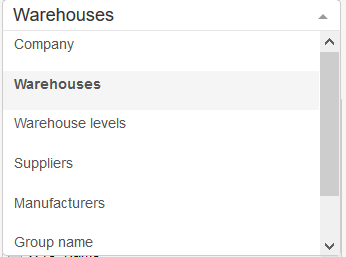
1) Company – inventory dynamics across the company;
2) Warehouse – inventory dynamics at each selected storage place;
3) Suppliers – inventory dynamics of the selected supplier (only for the goods and in these storage places, to which your selected supplier is assigned);
4) Manufacturers – inventory dynamics of the selected manufacturer within the company (for those goods and storage places, for which your selected manufacturer is assigned);
5) Group name – inventory dynamics via selected group;
6) Users – inventory dynamics of the selected user.
7) The purpose of this report is to see trends of inventory management. Information is provided for the last 52 weeks.
In order to make reading of big numbers easier / clearer, the significant numbers in Inventory Dynamics reduced to 3.
Significant digits are valid for values that are calculated in money.
4. Visibility of lost sales, transfers, overstock and write-offs in StockM.
There is possibility to see last week's lost sales, lost transfers, overstock and write-offs in the StockM window. These columns appear in the Inventory window (you only need to open them). You can see this information (excluding write-offs and transfers) in your weekly lost sales and overstock reports.
If you need to analyze a number of causes / problems, it is possible set such tasks to appear in the User Tasks window. The task would be visible to those managers whose products fall into these lists. A window will open with a list of items, where each item will need to be accompanied by the reasons for lost sales, overstock, etc.
The number of reasons for lost sales, lost transfers, overstock, or write-offs is determined company-wide - you can choose how many reasons you want to analyze. The settings are made by a StockM team.
To enable Report Analysis in StockM, you must inform a StockM team. At the same time, you will be sent a more detailed description of how to use these reports.
Report "Inventory level (DTA)"
1. The report is designed to evaluate the level of DTA goods inventory: STOCK-M → "Reports" → "Inventory Level (DTA)" (data is collected and recorded daily).
2. DTA items are showed in the report with balance > 0 relation with all DTA items (SKU through all warehouses), expressed in %.
3. Information is depicted by two curves:
1. The report is designed to evaluate the level of DTA goods inventory: Reports → Inventory Level (DTA) (data is collected and recorded daily).
2. DTA items are showed in the report with balance > 0 relation with all DTA items (SKU through all warehouses), expressed in %.
3. Information is depicted by two curves:
1)  - DTA goods/items, which balance is > 0. Expressed in %.
2)  - DTA goods/items, which (balance – amount (Safety buffer)) > 0. Expressed in %.
- In this report, after moving the mouse on selected curve, the date and values for both curves are showed.
- The report can be exported into excel. After selecting the desired storage place, supplier, group, click .
4. At the bottom of the graph select the incision, by which you want to review (analyze) the report:
1) Company – inventory level through the company;
2) Warehouses – inventory level in each selected storage place;
3) Suppliers – inventory level of selected supplier (only those goods and in these storage places, for which your selected supplier is assigned);
4) Manufacturers – inventory level in the company of the selected manufacturer (those goods and in these storage places, for which is assigned your selected manufacturer);
5) Group name – inventory level through the selected group;
6) Users – inventory level of the selected user.
Report "Interval analysis"
This report is paid. Report in StockM: REPORTS → EXTRA → INTERVAL ANALYSIS REPORT.
Report is needed for:
• Compare sales at different times (season and none season) at SKU level over warehouses
and calculate the seasonal coefficient.
• To calculate order once to the current moment according to the obtained
season coefficient for the current moment, evaluating the SKU settings
during the report formation;
• Upload once order if needed;
• Use the calculated season coefficient to create the season (as needed).
Go to : REPORTS → EXTRA → INTERVAL ANALYSIS

The report must specify the parameters:
• start date of the analyzed season;
• end date of the analyzed season;
• the start date of the comparable season (none season);
• the end date of the comparable season (none season) (if not specified, is automatically
selected according to the length of the analyzed period and assigns an end
date);
• warehouse (s);
• supplier (s);
For the formation a list of items, additionally may be specified:
• product group (s);
• state;
• ASS;
• SKU name fragment (items with this fragment will be included).
You'll see the following fields in the generated report:

• SKU;
• Item name;
• Group;
• Supplier name;
• Warehouse name;• Warehouse code;
• Unit.;
- Avg. daily sales during none season;
- All daily sales during none season (sum; unit);
• Avg. daily sales during season;
- All daily sales during season (sum; unit);
• Season coefficient. = Avg. daily sales during none season / Avg. daily sales
during season;
• Promo during season (field is empty - promo did not happened; promo
happened – the name of the promo);
• Current buffer;
• Current balance;
• Current on the way;
• Current promo (field is empty - promo is not running; there is a name - the
name of the ongoing promo);
• MOQ;
• USQ (package);
• Current amount to (at the time of the report generation)
• Calculated order once = Current buffer * (Season coefficient - 1). The
quantity can be edited manually;
• Use calculated order once (write 1 if the value " Calculated order once needs
to be loaded as a one-time replenishment; the field is left blank - if no
replenishment is required). By default in StockM, the field is left blank.
• IOH after once order = Current balance + Current on the way + Calculated
StockM replenishment + Order;
• ABC (at the time of the report generation;
- Manufacturer.
In the report “Interval Analysis” is possibility to calculate group total sales during the season and none season. If you want to see this information, you need to check “Add group totals”.
In the report for the new (which was not during the season sales) SKU, will be applied the group season coefficient.
System warnings
1. The STOCK-M system records errors, that can lead to incorrectly managed inventory. These errors appears in the System Warning window and we recommend to review and correct them: STOCK-M → "Warnings".
1. The StockM system records errors, that can lead to incorrectly managed inventory. These errors appears in the System Warning window and we recommend to review and correct them: Taskbar → Warnings.
2. Systematic warnings window is splitted in two parts „Critical warnings“ and „Other warnings“.
1) Critical warnings – this is warnings, which can influence inventory management directly. You have to check it daily and correct immediately. As a result of these errors, the goods will not be included into orders and the reports will be calculated wrong.
2) Other warnings – this is possible mistakes, which have to be reviewed and corrected. We recommend to check it at least once a week.
3. After clicking the button "Show", you will open a window with information about the error (item code, name, storage place, supplier, MOQ, BUFF, etc.). In most of the lists that appear, you can correct the errors immediately.
4. There are buttons „Fix“, near some errors, i.e. the system suggests how to correct these errors. After clicking this button, the system will correct the parameters to the required values.
„Critical warnings"
1. Buf < MinBuf or Buf
DTA items buffer can‘t be smaller than min. Buffer or MOQ (item might not be involved into the order). Auto fix will increase the buffer to min. Buffer or MOQ (depends on which is bigger).
- Click the button „Show“ – in the table that opens you will see the list of items, which buffer is smaller than minimum buffer or MOQ;
- If you wil click the button „Fix“ – the system will increase the buffer for all items to minimum buffer or MOQ.
2. MOQ
The minimum order quantity (MOQ) for an item can not be smaller than supplier's non-destructive quantity (USQ), otherwise an incorrect order will be formed for the DTA item. Check and fix MOQ and USQ for these items:
- if MOQ and USQ are updated from an accounting program, make changes in the accounting program;
- if MOQ and USQ are not updated from an accounting program, make changes in STOCK-M.
3. DTA items supplier don‘t have supply schedule
It is fixed that the item must be in storage place (DTA), but there is no orders formation schedule for the supplier, from which the item is delivered (the system will not place an order for the item).
- Click the button „Show“ – in the table that opens you will see the list of suppliers, with at least 1 item set as DTA, however the supplier is not active or not active orders formation schedule:
Set a schedule for order formation or adjust supplier settings at a specific storage place for your supplier (see 1. Order Management Rules or 4. New Supplier Entering Rules).
4. Items for which periods are overlapping
The same item can not participate in several periods if dates overlap.
For items, participating in two or more periods, if the dates of the periods overlap, two periods are executed at the same time - the end of the first period is not fulfilled and the second period shall be allowed to happen.
- click the button "Show" - the table that opens shows a list of items that are involved in multiple periods with overlapping dates, at the same time.
- Remove the item from one period and set a new period with other dates.
5. Not confirmed supply schedules (if it is agreed turning on of this function with project manager).
- Click the button „Show“ – the table that opens shows the list of not confirmed supply schedules.
- Confirm supply schedules (see: Supplier settings).
6. USQ<=0
- USQ (unbreakable supplier quantity) has to be bigger than 0 unit, otherwise will be formed wrong order for DTA item. Auto correct will set USQ = 1.
- Correct item USQ in item card (see: Item (SKU) settings; see: Supplier settings), if USQ is not updated from client‘s accounting. Auto correct will set U USQ = 1).
- If USQ is not updated, then correct items in US! Accounting.
7. Active items don‘t have active supplier.
- All active items will get into this list (not NA state and not NM state), for which inactive supplier is assigned. Items, which have OUT mover feature, will not be involved into the list.
8. Optimization: purchase price <= 0
When order is optimized according the amount, purchase prices are checked and if the active goods/items don't have the purchase price, the order is not optimized. The list will show items with Purchase Price <= 0 for suppliers, for which is set order optimization according the amount.
9. Items weight/volume = 0 (only DTA items are involved in system messages)
- When order optimization is set for the item supplier, but at least one item weight / volume = 0, then the order will not be optimized.
- Click the button "Show" - in the table that opens, you will see the list of items, that need to be filled in by weight or volume. Enter the weight / volume in the SKU list.
„Other warnings"
1. Item data are not updated more than 7 days
Items, which data are not updated, distort reports due to their false old data, because the last balance, received during data exchange, is saved and visible in the STOCK-M system.
Items, which data are not updated, distort reports due to their false old data, because the last balance, received during data exchange, is saved and visible in the StockM system.
- Click the button "Check", if there is at least 1 item that has not been updated for more than 7 days, then the button "Show" will appear (this system warning checking may take more time, because each item is checked and if data for them is updated).
- Check for what reasons listed items are not updated from the accounting.
- After clicking the button "Show" - in opened table you will see a list of items, which data have not been updated for more than 7 days.
- If the items do not actually have to be updated/renewded to STOCK-M, then change the state of the items to NA, in the STOCK-M (see: Item (SKU) Settings);
- If the items do not actually have to be updated/renewded to StockM, then change the state of the items to NA, in the StockM (see: Item (SKU) Settings);
- If the items need to be updated to STOCK-M, then adjust the appropriate procedures in the accounting.
- If the items need to be updated to StockM, then adjust the appropriate procedures in the accounting.
- If you click the button "Fix" - the system will turn off the entire list of items, which have not been updated for more than 30 days (will set to status NA).
2. Balance of item <0
The balance of item must be >=0, because in opposite way orders and reports will be distorted. Select for what reasons the quantities were updated with negative sign for the specified items from the accounting.
- If the balance is not negative, then correct it in the accounting program immediately.
3. Buffer update in the future
These are items for which the system will not offer to change the buffer, before the due date (30 days and longer). The buffer non-change setting is done by creating a new period, by placing the check mark "Do not allow for the system to change buffers automatically to a specified date" and by setting a date.
WE RECOMMEND: use in these cases, when you plan to sell all the balance in the end of promotion/season, however you don‘t need to keep a bigger level of inventory. Later additions must proceed to the buffer that was before the start of promotion/season.
- After clicking the button „Show“ check if there are no items, for which is set distant automatic buffer change date.
4. Volume of database
This information message shows how much space is occupied by the STOCK-M database.
5. MOQ<>n * USQ, n=1, 2, 3 ...
MOQ must be USQ iterative. The system will suggest to order the minimum quantity as specified in the MOQ, then the quantity of order will increase as specified USQ (eg: MOQ = 10, USQ = 3, this is the sequence of ordered quantities: 10, 13, 16, 19, 22, .. .).
- Click the button „Show“ – in the table that opens you will see the list of items, which MOQ is not USQ iterative.
- If you will click the button „Fix“ – the system will increase the MOQ to USQ iterative for all items in the list.
6. Item in the center DTO, region DTA, supplier central warehouse, but the item is not OUT mover
When only one storage place is managed, this warning is not relevant.
When there are managed more storage places and if in region item is set DTA (item to the region is delivered from the central warehouse), however the balance of the item is not supported (DTO) in the central warehouse, then regional warehouses will not receive the items, because these items are not ordered from the supplier.
- Click the button „Show“ - in the table that opens you will see the list of items, for which is determined, that doesn‘t have to be in the center (DTO), but must be in the region (DTA):
- Correct the status of item in the center (DTA – must be in the center) or in the region (DTO – shall not be in the region) or set the feature OUT (item, taken out from the assortment) (see: Item (SKU) settings).
7. Purchase price <=0; sale price <=0
Incorrect prices distort reports. You need to check and adjust prices in accounting that updates data to STOCK-M.
Incorrect prices distort reports. You need to check and adjust prices in accounting that updates data to StockM.
8. Very rare setting: RD>GD (In exceptional cases, may be RD>GD, used only then, when it is seeking to decrease the inventory fast. The setting is made only after agreement with the STOCK-M team).
8. Very rare setting: RD>GD (In exceptional cases, may be RD>GD, used only then, when it is seeking to decrease the inventory fast. The setting is made only after agreement with the StockM team).
Normally, the RD must be equal or lower than the GD.
- Click the button „Show“ – in the table that opens you will get the list of suppliers, which RD>GD;
- Correct supplier RD and GD (see: Supplier settings).
9. Buf < MinBuf
DTA item's buffer cannot be less than min. buffer. Auto-correction will increase the buffer to min. buffer.
- Click the "Show" button - the table that opens lists you will see the items whose buffer is less than the minimum buffer.
- if you press the "Edit" button - the system will increase the buffer to min. Buffer.
10. Buffer < Lowest system buffer
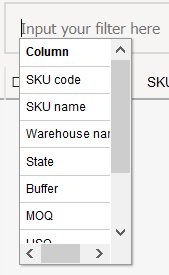
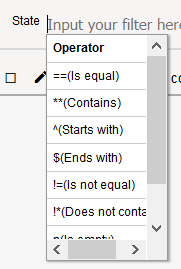
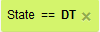
The warning Buffer Lowest system buffer – value, which is specified when desired that the buffer would not be less than coefficient (1-1.5) x MOQ (minimal order quantity). LowSysBuff is set for all goods at company level total or separate at warehouse level. 1. After opening the window of StockM, where you want to work, the filter table opens automatically: 1) In some windows (eg. inventory, placed orders history and etc.) filter is filled in by default. 2) If you want to filter only a specific item, supplier and etc., put the cursor to the location „Input your filter here“. 2. In the filter field, place your cursor to "Input your filter here": Select the column you want to search by 3. After entering all filter conditions and capturing it, click 4. If you entered the filter condition incorrectly, press 5. If you want to filter all the list, i.e. not to use the filter, then click Enter without using the filter or 6. In order to see more filtered rows in the window – you can hide the filter after clicking 7. In the filtered table there are only these fields, whose visibility you selected in the corresponding window. 8. Each user can save the required / most often used filters. For example: if you are always working with a particular group of items, then select the column "group", the corresponding operator and values in the filter entering field. After capturing filter conditions - save it through the table settings window. You can save as many filter combinations as you need. You can also remove them from the list at any time if the filter becomes not relevant. Saved filters will be visible only to the user who saved them. Each time you reopen the window, you will be able to select the desired saved filter you need. 9. The search will not work, if in the text fields you will execute the search according to numerical values. All Extra and Wextra fields can be only text fields. Their names can be changed at the start of the project. If you want to know, what fields exactly are transferred via Extra and Wextra fields – contact your Project manager. 1. When you start to write any fragment, the list will be shortened according to it. 2. Such search is active in all windows, which have drop-down lists. 1. In the STOCK-M window that opens, you can sort the values of the selected column (numeric - from the smallest to the biggest and opposite; text - according to alphabet from A to Z and 1. In the StockM window that opens, you can sort the values of the selected column (numeric - from the smallest to the biggest and opposite; text - according to alphabet from A to Z and 2. On the desired column name, which you want to sort, click with the left mouse button 1 time, the system will sort the column. Near the column name appears 3. If you click one more time on the same column name with the left mouse button, the system will sort the column in a different order You can select which columns you need to see, while working with the inventory management system STOCK-M. You can select which columns you need to see, while working with the inventory management system StockM. 1. When you open STOCK-M window, where you want to work, after filtering the relevant item/storage place and other (or before filtering the list), click „Set visibility for columns“ in table settings. 1. When you open StockM window, where you want to work, after filtering the relevant item/storage place and other (or before filtering the list), click „Set visibility for columns“ in table settings. 2. In the table that opens mark these columns, which you want to see in STOCK-M window and click the button „Confirm the setup“. 2. In the table that opens mark these columns, which you want to see in StockM window and click the button „Confirm the setup“. 3. If you will sign in from the same device, the same window will be opened, which was opened before signing out with columns visibility and arrangement. 4. If you want to see columns again, select "All columns" in the opened STOCK-M window via Table settings window, in the columns settings list. 4. If you want to see columns again, select "All columns" in the opened StockM window via Table settings window, in the columns settings list. OR select „Select all“ in the columns visibility form 5. In the STOCK-M system window that opens, you can select the size of column, i.e. decrease or increase. Place the mouse on the right side of the column name, while appears 5. In the StockM system window that opens, you can select the size of column, i.e. decrease or increase. Place the mouse on the right side of the column name, while appears OR select „Autosize All Columns“ after clicking the right button of the mouse in any place of the table. 6. In the STOCK-M system window that opens, you can also change the place of each column, in the order you prefer. Place the mouse on the column name, which you want to move. Click the left button of the mouse and "drag" the column to the desired place. 6. In the StockM system window that opens, you can also change the place of each column, in the order you prefer. Place the mouse on the column name, which you want to move. Click the left button of the mouse and "drag" the column to the desired place. 7. You can "freeze" the desired column. Cick the right button of the mouse on the desired column name and drag it to the left side, while the icon 8. You can save the desired / mostly used column visibility and arrangement in the Table Settings, by selecting Such an options can be seen in any window by calling up the menu and right-clicking on any row: It is possible to select all lines of one page, which can be marked / unmarked by calling the menu, by pressing the combination “ctrl + a” in the keyboard. If the menu is called up in the Inventory window, the Inventory window will not be visible between the selections (same logic as with the Suppliers schedule). The menu item will also not be visible if the user does not have permission to see a specific window. When you work with inventory management system STOCK-M, you have a possibility to export the selected list to Excel or csv. In opened STOCK-M window at the top of any table find the icon When you work with inventory management system StockM, you have a possibility to export the selected list to Excel or csv. In opened StockM window at the top of any table find the icon There are additional forms for export in some windows in the export list (for example, in the supply graphs window you can download full information form about suppliers). 1. In the STOCK-M window that opens, you can copy the value of one of the selected fields, e.g. item code, name, etc. mark the selected field with the left button of the mouse and press "Ctrl + C" on the keyboard - the value of the field is copied. Then press "Ctrl + V" at the selected place (STOCK-M filter, excel, word). 1. In the STOCK-M window that opens, you can copy the value of one of the selected fields, e.g. item code, name, etc. mark the selected field with the left button of the mouse and press "Ctrl + C" on the keyboard - the value of the field is copied. Then press "Ctrl + V" at the selected place (StockM filter, excel, word). 2. If you want to copy more than one field, then mark the desired place with the left button of the mouse, after clicking the right button of the mouse select "Copy" or "Copy With Headers" from the list and paste the copied values into the desired file (excel, word, etc.). You can see the schedule of each item movement in STOCK-M system. You can see the schedule of each item movement in StockM system. 1. The schedule of the item you can open in STOCK-M window, when you click the icon 1. The schedule of the item you can open in StockM window, when you click the icon 2. In the item graph window that opens, you see the 3-month dynamics of the item buffer and safety buffer (red zone - if the balance of item is in this zone, the inventory level is risky low; yellow zone - the level of item inventory is optimal; green zone - the level of item inventory is safe, above green areas - overstock). If you place the mouse on the green area, you will see the date of the buffer, the value of the buffer, and the reason for changing the buffer (if the buffer was changed that day, you'll see a red dot at the top of the buffer). The color display of the buffer is not displayed in the SKU schedule during the period when the item status is * TO. The value of the buffer is written "No * TA". 3. Also in the graph of an item you see curves: balance ( If you place the mouse on the selected curve (for example, balance) dot, you will see the date of that balance, value of that balance. 4. When you put the mouse on 5. When you place the mouse in the graph on 6. If you want to see the movement of the item through all the period (from the moment when item appears/system is installed), click the button 7. If you want to analyze only selected period ir to increase the selected part of the graph, then place the mouse on the graph desired to analyze period or at the start of the graph, click the left button of the mouse and drag the rectangle to the desired side. 8. If you want to return item graph to the primary view, click 9. If you want to save item graph, click 10. If you want to export item graph to Excel, click the button 11. There is provided other relevant information at the bottom of the graph: USQ, MOQ and other. An additional window appears with the information of supply graph, when you put the mouse on the next delivery date. 12. Once the graph is opened, you can navigate through the graphs of other items in the list from which the graph was opened. Icons have been made in the upper right window of the graph, which can be used to: In the STOCK-M inventory windows (STOCK-M -> Inventory -> Buffers to increase, Buffers to decrease and others) click the icon In the StockM Taskbar -> Buffers to increase, Buffers to decrease and others, click the icon 1. Ordering amount – for what amount of money inventory shall be ordered according to set buffers of items; 2. Balance amount – what amount of money compose inventory of items. STOCK-M shows 100 rows by default in a single window (the user can change the number of showed rows by selecting 200 or 500 rows, when user will open the page again, by default will be set 100). If you awork with a list of more than 100 rows, then more than 1 page will appear. Pages are showed in the center at the bottom of the window. StockM shows 100 rows by default in a single window (the user can change the number of showed rows by selecting 200 or 500 rows, when user will open the page again, by default will be set 100). If you awork with a list of more than 100 rows, then more than 1 page will appear. Pages are showed in the center at the bottom of the window. 1. If you want to go to another window, click 2. If you want to go to another page (eg. middle, 10 page, from page 20), to the field, in which is written the number of current page, enter the number of the desired page and click „Enter“ or the narrow 3. If you want to go to the last page, click 4. Do the same actions, when you want to come back to the previous pages, click Filter

 .
. or Enter. If the list, accordint to specified filter conditions, loaded button will be green
  .
. and enter filter condition again. If you only need to adjust the entered search value, you can do it without overwriting the entire condition again for the last filter condition, after clicking "Backspace" in the keyboard you will be able to edit the last filter condition from the end. .
 . If you click this icon one more time – filter input window will open again. The number in the icon indicates how many filter conditions are recorded in the filter.
Search according context in drop-down lists
Sorting
 , it means that it is sorted in ascending order (from the lowest to highest; from A to Z).
 , appears near the column name, it means that it is sorted in descending order (from the highest to the lowest; from Z to A).
Selection of columns
 (double-sided arrow). Click the right button of the mouse and move the mouse to the left or right side (depending on whether you want to increase or decrease the size of the column). (double-sided arrow). Click the right button of the mouse and move the mouse to the left or right side (depending on whether you want to increase or decrease the size of the column).
 will appear. You will always see such column at the top of the list.
 , then you will not need to manage table rendering, just choose from the saved settings. The number of table settings, which is saved, is not limited and visible only to the user who made the saving.
 Additional functionality of the right mouse button
Table export to Excel (*.xlsx), to CSV (*.csv)
 . Click the icon, select to what form you want to export the table, download the desired file and save the table to the desired place.. Click the icon, select to what form you want to export the table, download the desired file and save the table to the desired place.
Copying item code/name/other fields
Item buffer schedule
Item schedule
 near the selected item or in the line by right-clicking and selecting “SKU graph”. near the selected item or in the line by right-clicking and selecting “SKU graph”.
 ), sales+transfers (
 ), supplied (
 ), sales (
 ) PTO (
 ). These curves you can take off and put on again. If you want to do this, you need to click on the desired curve in the a legend. Your made changes will be saved automatically, i.e. in other‘s items graph you will see only these curves, which you marked in previous item graph. If changes are not made, by default in item graph are showed all curves.
 you will see when the order was formed, how many pieces the system STOCK-M suggested to order and how many were ordered, so order placing date and number.
 , you will see written-off quantity if the item and date.
 , which is at the top of the graph.
 .
. and select the place, where you want to save item graph. .
 – to open the graph of the next item in the list in the window;
 – to open the graph of the previous item in the window;
 – to capture an opened graph. The graph of the next item will be opened in a new window.
Order amount, balance amount
 , which is at the bottom in the right corner of the table, here you can see information of the selected list of items: , which is at the bottom in the right corner of the table, here you can see information of the selected list of items:
Paging

 .
. .
. or
or  .
.